NEW LEGENDRY TH11 HYBRID/TROPHY Base 2026!! COC Town Hall 11Trophy Base Design – Clash of Clans
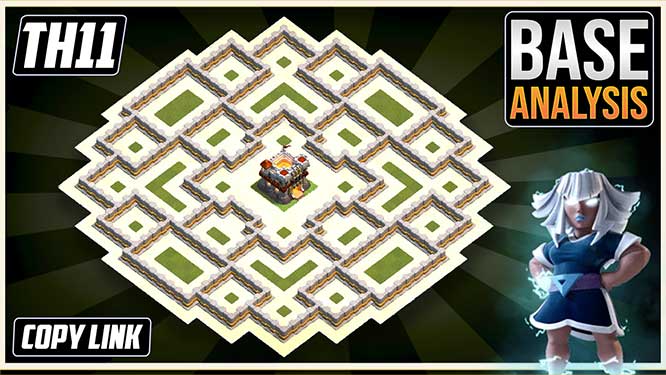
If you’re looking for NEW LEGENDRY TH11 HYBRID/TROPHY Base 2026!! COC Town Hall 11Trophy Base Design – Clash of Clans, then you have come to the right place. This base is one of the best base for coc Town Hall 11 available on YouTube. This Town Hall 11 coc base layout can be used for Trophy pushing. To know more about this TH11 best coc base, continue reading this post.
BASE DESCRIPTION

Hey guys, this is Dark Barbarian, and today we’re building a brand-new Town Hall 11 Hybrid Base that’s designed to protect our loot while also helping us hold on to our trophies. I’ll walk you through the important parts of this layout during the base analysis, so you’ll understand why each section has been designed the way it is and whether this base is worth using.
Let’s do the Base Analysis!
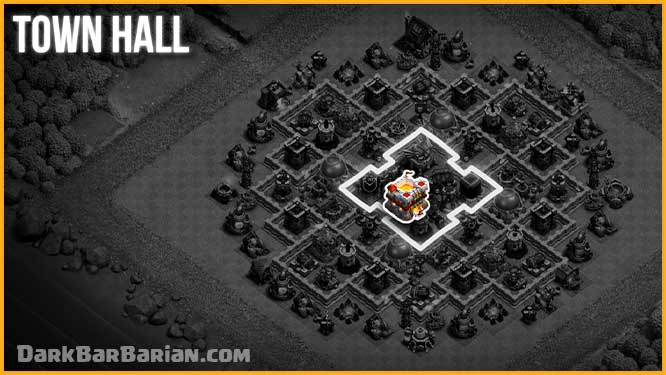
First, let’s start with the Town Hall. The Town Hall is positioned deep inside the central portion of the base, surrounded by several layers of walls and defensive buildings. Since we want to protect both the one star and the loot stored inside the Town Hall, keeping it away from the outside is extremely important.
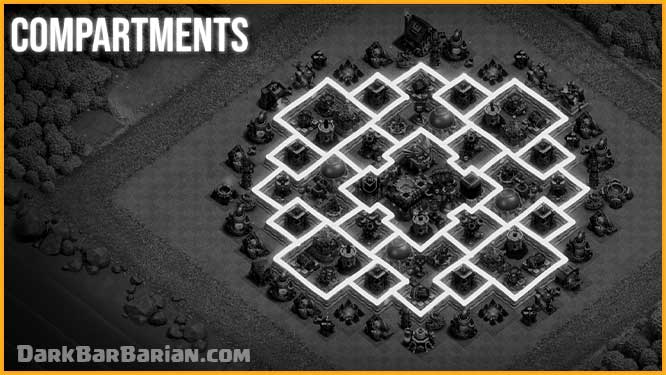
Now, one of the biggest strengths of this layout is the way the walls have been divided into so many smaller compartments. Instead of giving attacking troops one clear route toward the center, the walls constantly force them to change direction and deal with another section. This is especially useful against troops like Giants, Golems, and Ice Golems because they can spend a lot of time working through walls while our defenses continue attacking them. Even if the attacker gets a good start, these extra layers can slow the attack down enough to create a time fail.
Moving on to the defensive coverage, the buildings are spread across the entire layout rather than being concentrated in one area. This means an attacker doesn’t have an obvious weak side to exploit. No matter which direction they choose, they’ll have to deal with multiple layers of defenses before they can reach the important buildings in the center.
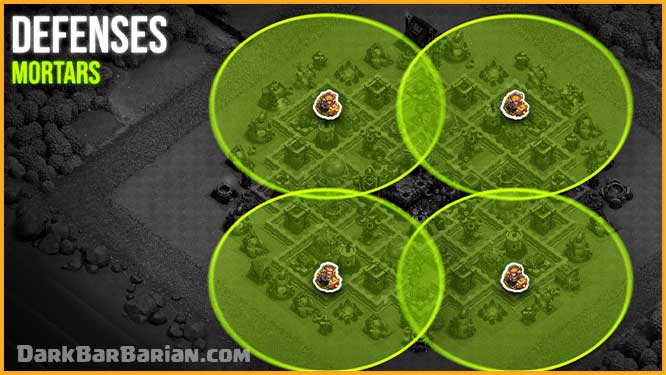
Starting with the Mortars, they’re positioned toward the outside of the base. Their main purpose here is to deal with spam armies such as BARCH, GiBARCH, and Mass Goblins. Since these troops usually begin by clearing the outside buildings, the Mortars can start dealing splash damage immediately. At the same time, their range reaches well into the base, so they’re not limited to defending just the perimeter.
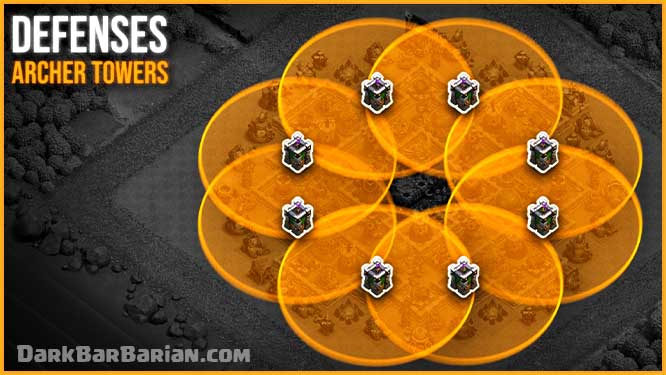
The Archer Towers are distributed around the outer peripheral to maintain consistent coverage from different directions. Since they can target both ground and air troops, they provide useful support against a wide variety of attacks.
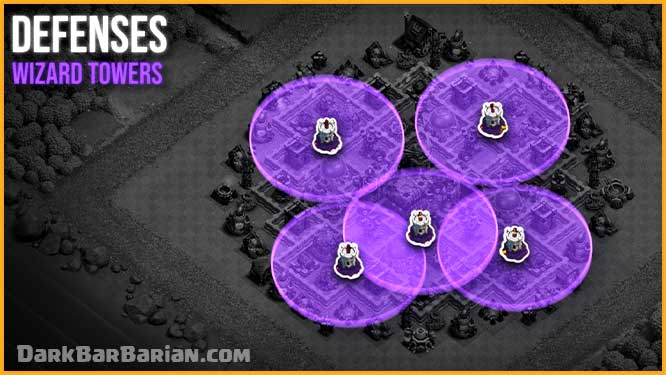
Next, we have the Wizard Towers. I’ve spread these out instead of putting them together because we don’t want all of our splash damage disappearing at the same time. They’re also positioned close enough to the resource compartments to help protect our storages from groups of troops trying to grab the loot. Their splash damage can be especially useful against troops that attack in groups, so keeping them alive throughout the attack is very important.
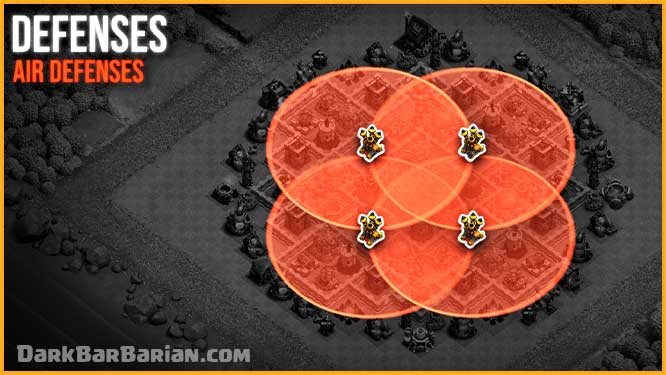
Now let’s move on to the Air Defenses. These are separated into different compartments so an attacker can’t get huge value from a single Lightning Spell attack. They’re placed deep enough inside the layout to make them difficult to reach early, while their ranges overlap large portions of the base. Together with the Air Sweepers, they create several layers of protection against air armies such as LavaLoon, Mass Dragons, and Electro Dragons.
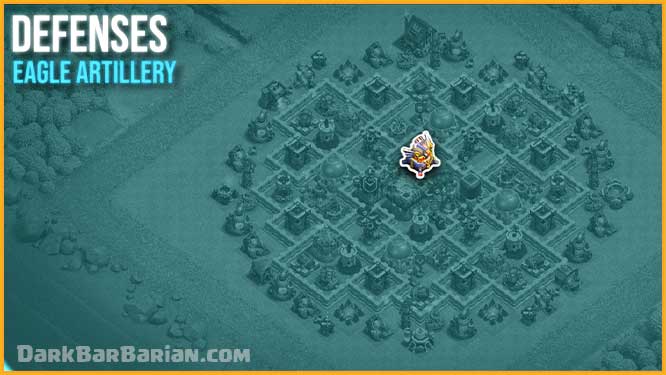
Now let’s talk about the Eagle Artillery. It’s protected near the heart of the layout, which is exactly where we want such an important defense. Keeping the Eagle away from the outer layer means attackers can’t easily destroy it at the beginning of the raid. Once the attack develops and the Eagle becomes active, its long range allows it to put pressure on troops across a huge portion of the base.
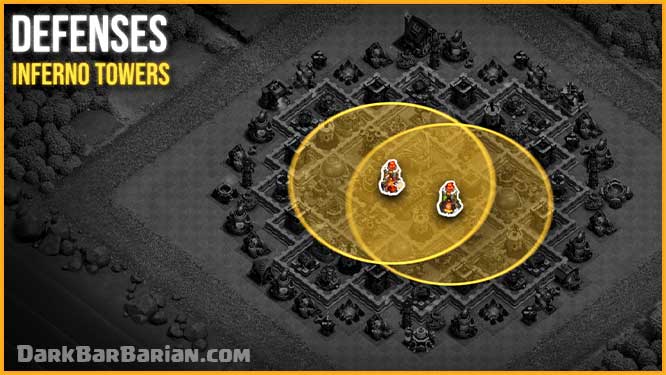
The Inferno Towers are also kept in the core and separated from one another. This gives them coverage over several important buildings while preventing an attacker from getting too much value from a single spell or troop push. They also work together with the surrounding defenses to make the central area extremely dangerous.
For Inferno mode, Make sure to configure them based on the types of armies you’re facing. If you’re up against armies with more troops but lower hitpoints, like miners, bowlers, and witches, use the multiple mode. If you’re facing high hitpoint troops like Electro dragons, pekkas, and golems, use the single mode.
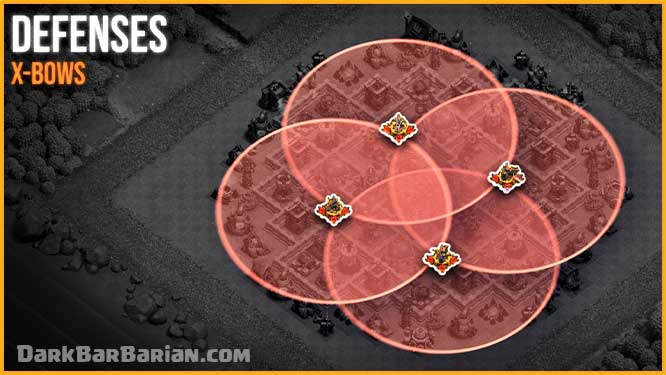
The X-Bows are positioned in the inner compartments, giving them a large amount of overlapping coverage. I’ve kept them protected rather than exposing them on the outside because they become much more valuable when they’re allowed to stay alive for a longer period of the attack. I also prefer keeping them on Ground and Air mode here because this base needs to be prepared for both types of attacks. Giving up some range just to specialize against ground troops isn’t worth it when an air army can approach from another side.
The Cannons are spread through the outer defensive layers to strengthen the ground side of the base. They help cover areas between the heavier defenses and provide additional damage against troops such as Giants, Hog Riders, and other ground units.
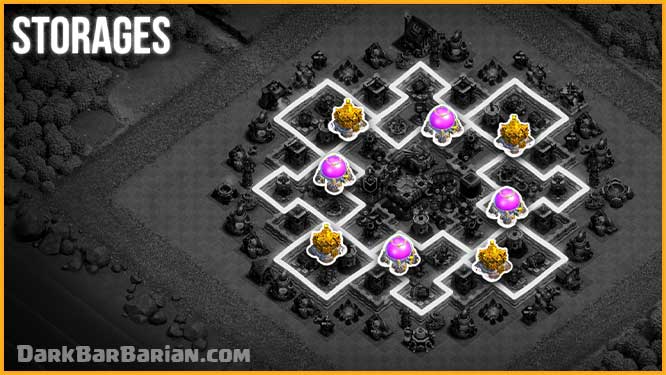
Storages are spread across different compartments, unlike bases that cluster all storages together in one area. This makes it harder for attackers to loot everything. Each storage is in a separate compartment, forcing the attacker to take out the whole base to steal all the resources. never put the same type of storages on one side of the base, for example, if we put both the gold storages on this side of the base, the attacker can take almost all your gold just by taking out this portion of the base. so in order to avoid that. we place them alternatively, just like this base.
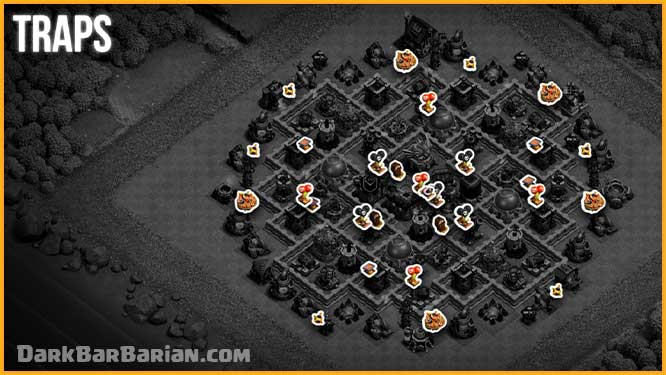
Now let’s move on to the traps. Trap placement is especially important in a compartment-heavy base because we can use the walls to predict where troops are likely to travel. The traps are positioned around entry points, wall approaches, and paths where attacking troops are likely to move between defenses.
Spring Traps are most useful when they’re placed along predictable ground paths. Troops such as Hog Riders and Giants can be redirected through narrow sections of the base, giving the Spring Traps a much better chance of activating at the right moment.
The bombs and the Giant Bombs around the wall approaches are also important because Wall Breakers can completely change the way an attack develops. If the attacker loses their Wall Breakers before they can open the correct compartment, their main troops may be forced to attack buildings from the outside instead of entering the base. That can completely ruin the funnel and waste a lot of the attacker’s time.
The air traps are spread through the defensive layers to support our anti-air defenses. Seeking Air Mines can deliver heavy damage to individual air units, while Air Bombs are useful against groups of lighter air troops. Their purpose isn’t to defend the entire base by themselves, but to weaken incoming air troops enough for the Air Defenses and other anti-air buildings to finish them off.
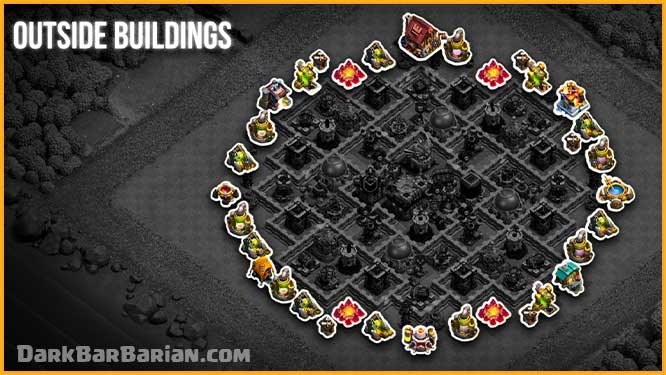
Finally, let’s look at the outer buildings. I’ve avoided stacking the same types of collectors and outside buildings together. Spreading them around the perimeter makes the funnel more difficult because an attacker can’t simply clear one small section and immediately remove several similar buildings. It also forces troops to move between different targets, giving our defenses more time to work.
And that’s it for the Base Analysis.
If you want to copy this base just click on the Copy Base Button, it will redirect you, from where you can easily copy this base design.
BEST DEFENSIVE CLAN CASTLE TROOPS COMBINATIONS
Using clan castle troops for defending your base is highly recommended as they can put the attacker in trouble by distracting them. Even though the base alone is sufficient to stop most of the attacks used by Town Hall 10 attackers, using the clan castle can help a lot. At Town Hall 10 you can get Maximum of 35 housing space in your clan castle, here are some of my recommendations for CC troops combinations for defense at Town Hall 10 :-
- 1 Electro Dragon + 1 Balloon (Recommended)
- 1 Baby Dragon + 2 Valkyrie + 2 Wizard
- 1 Golem + 1 Wizard + 1 Archer
- 1 Witch + 5 Wizards + 3 Archers
- 1 Lava Hound + 1 Balloon
- 1 Dragon + 3 Wizard + 1 Archer
Since most people can’t get these troops from their clans, you can also use other troop combinations which are easily available like all wizards, all balloons or any other troop combination but i highly recommend you to have above mentioned troops for best defensive experience at Town Hall 10.
FEATURES OF THIS BASE
- Centered and well-protected Eagle Artillery
- Air Defenses are well protected
- Optimal Perfect traps placement
- So many compartments that slows down opponent troops
- Wizard Towers in well-protected compartments
- Great Against Both Ground & Air Attacks
- Inferno towers well protected near the core.
- X-bows in well protected compartments
- Archer Towers in each corner of the base.
- Bomb tower is placed near the inferno towers.
COPY BASE
If you want to copy this base just click on the Copy Base Button, it will redirect you, from where you can easily copy this base design.
Copy BaseAbout Author