
NEW BEAST TH10 HYBRID/TROPHY[defense] Base 2025!! Town Hall 10 Trophy Base Design – Clash of Clans
![NEW BEAST TH10 HYBRID/TROPHY[defense] Base 2025!! Town Hall 10 Trophy Base Design – Clash of Clans](https://darkbarbarian.com/wp-content/uploads/2025/04/thumbnail-1.jpg)
If you’re looking for NEW BEAST TH10 HYBRID/TROPHY[defense] Base 2025!! Town Hall 10 Trophy Base Design – Clash of Clans in Clash of Clans, then you have come to the right place. This base is one of the best base for coc Town Hall 10 available on YouTube. This Town Hall 10 coc base layout can be used for Trophy pushing. To know more about this TH10 best coc base, continue reading this post.
BASE DESCRIPTION
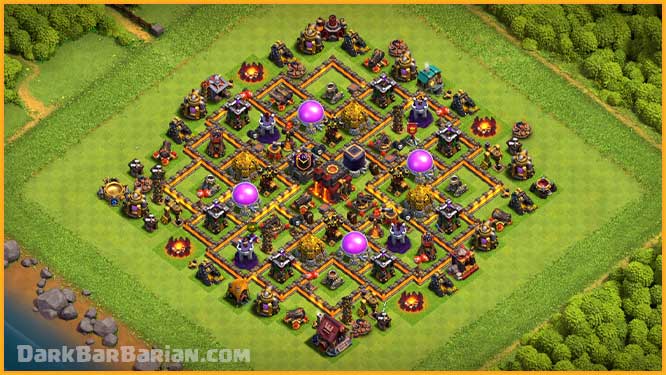
What’s up guys, Dark Barbarian here, bringing you another solid Hybrid Base design for Town Hall 10. This base is crafted to keep your loot safe while holding onto your trophies. In the base analysis segment, I’ll break down its defensive strengths so you can decide if it’s the right fit for your playstyle.
Let’s do the Base Analysis!
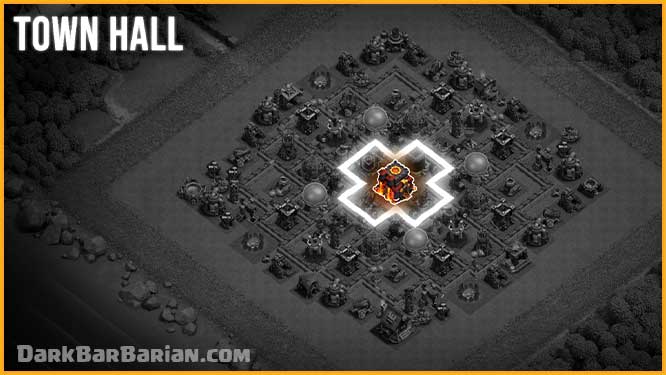
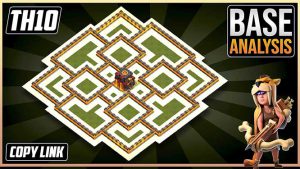
As you can see the town hall, just like my previous hybrid base designs, the Town Hall is safely positioned at the center of the base. This is crucial since it’s worth one star and contains a substantial amount of loot.
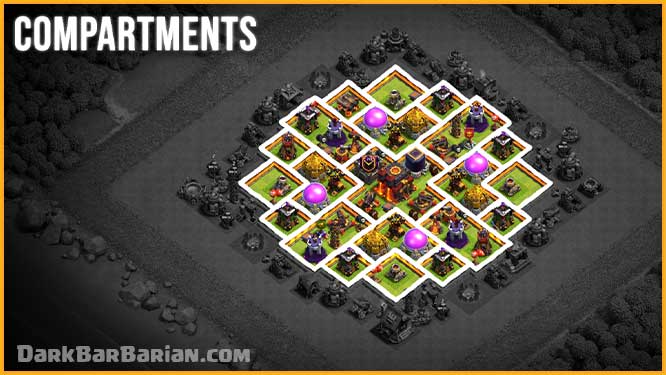
Another great feature of this base is the abundance of compartments spread throughout the layout. This setup effectively slows down enemy attacks and can even deplete their troops over time. Troops like giants and golems often get trapped against walls, making them easy targets for defenses and strategically placed traps.
When it comes to defenses, they are positioned in such a way that they protect the whole base and keep it strong from all sides.
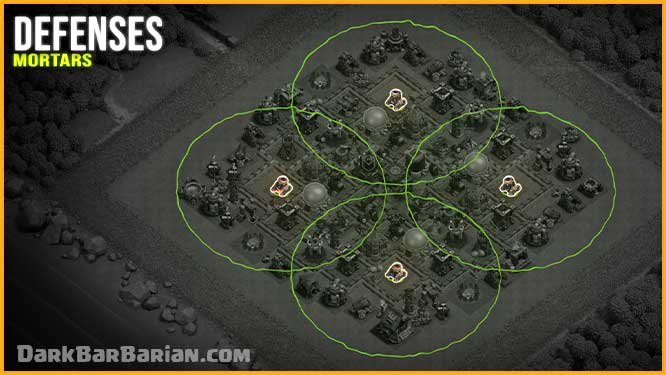
Mortars are positioned on the outer layer of defense to help counter spam attacks like Mass Goblins, GiBARCH, and BARCH. However, their placement isn’t just for protecting outer buildings, they are strategically set up to provide coverage across almost the entire base.
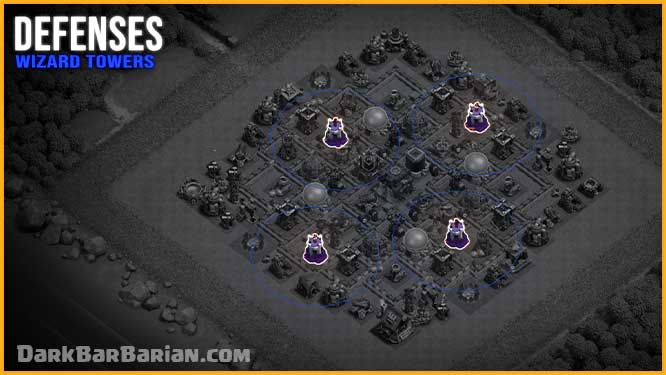
wizard towers are placed at a distance from one another in different compartments, so that they can provide air splash damage coverage to pretty much most of the base covering a lot of defenses in their range.
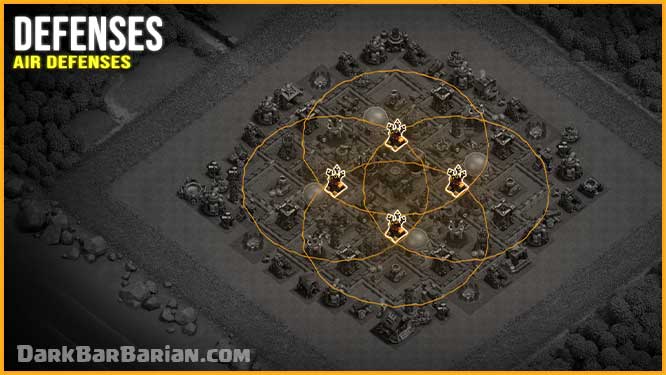
When it comes to air defenses, they are placed in separate compartments to prevent them from being taken out all at once by lightning spells. Their strategic distribution ensures full coverage across the base within the walls. Additionally, they are paired with air sweepers to enhance defense against air attacks like Lava Loons, Mass Dragons, Baby Dragons, and Minions.
Archer towers are evenly placed in each corner of the base so that they cover the whole base and no side is left weaker to air attacks.

The Xbows are strategically positioned to provide extensive coverage across the base. They are set to target both ground and air troops, as I’ve encountered attacks from both, making this the most effective setup for defense.
Inferno Towers are the most crucial defenses at Town Hall 10, so it’s essential to keep them well-protected while maximizing their effectiveness. That’s why I’ve placed them near the core of the base—this position keeps them safe while allowing their range to cover key defenses and important structures like the Town Hall, Wizard Towers, Dark Elixir Storage, Air Defenses, and X-Bows.
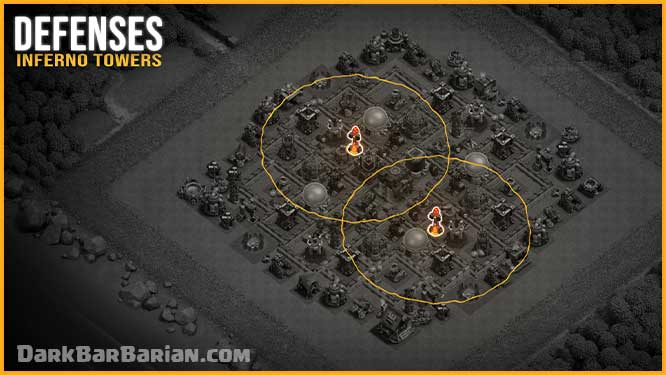
You can adjust the Inferno Tower mode based on the types of attacks you’re facing. If you’re dealing with low Hitpoints, high troop-count armies like Miners, Bowlers, and Witches, the multi-target mode is the best choice. However, if you’re up against high Hitpoints, low troop-count armies like Golems, Electro Dragons, and P.E.K.K.As, then the single-target mode will be more effective.
Cannons are placed right where they are needed providing the overall balance to the base and making this base perform pretty well against ground attacks.
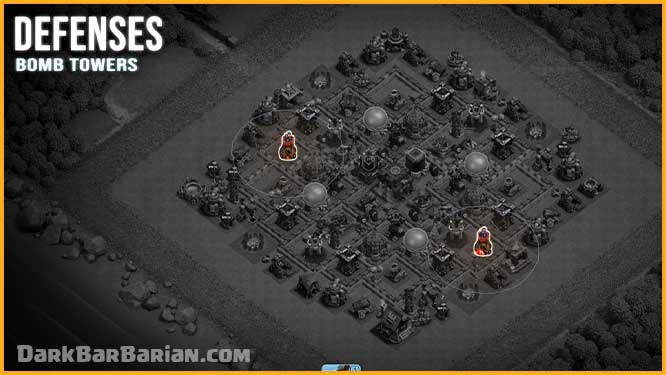
Now, let’s talk about Bomb Towers. At Town Hall 10, we have two of them, and they are placed in separate compartments away from each other. Bomb Towers are highly effective against Hog Riders, Giants, and Miners since they act as both defenses and traps—drawing in defense-targeting troops and dealing massive damage upon destruction.
This placement forces opponents to use their Heal Spells early in the attack, leaving their troops vulnerable later in the battle when they need healing the most. This strategy adds extra pressure on attackers and increases the base’s overall defensive strength.
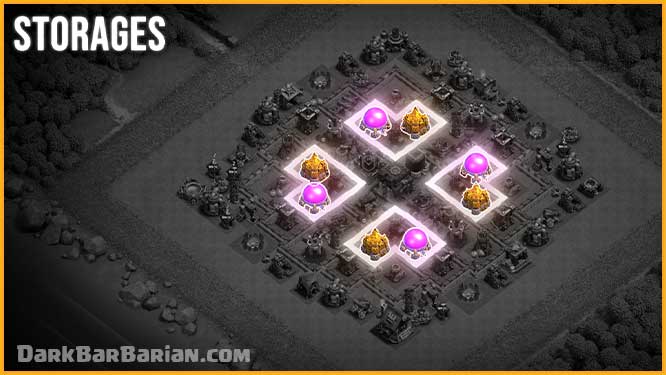
When it comes to storages, they are spread evenly throughout multiple compartments; most rookie base designers make the mistake of placing all storages in the center and defenses on the outer compartments. As a result, once the attacker has penetrated the compartment of defenses, they have access to all of the loot.
Because the storages are in different compartments in this base, the attacker will have to take out the entire base in order to acquire all of the loot.
Also remember to never put the same type of storages on the same side of the base; for example, if we put both gold storages on this side of the base, the attacker will be able to grab almost all of your gold merely by destroying this portion of the base. As a result, in order to avoid this. We alternate their placement, much like this base.
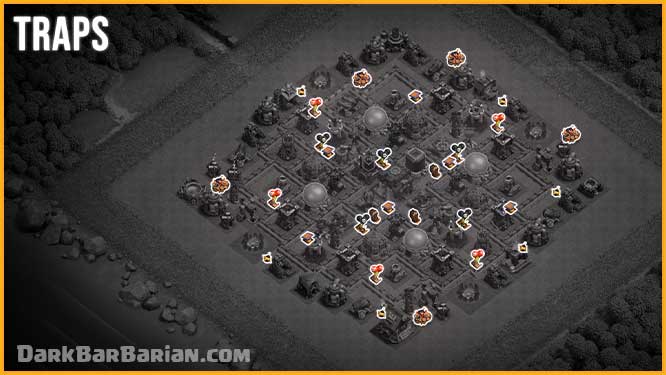
Now coming to the placement of the traps, after observation of so many attacks on this base, spring traps are strategically placed in different compartments according to the pathing of defense attacking troops like hogs and giants, which helps in making this base stronger against ground attacks.
We’ve placed bombs and giant bombs outside the walls to take down the wall breakers. By doing this, we’re hoping to break the attackers’ funnel and prevent their troops from entering the base. Instead, they’ll likely head for the outside trash buildings, which will ultimately cause the attack to fail.
Seeking air mines and air bombs are placed near the air defenses to help the air defenses take out air troops such as balloons, dragons, baby dragons, and lava hounds.
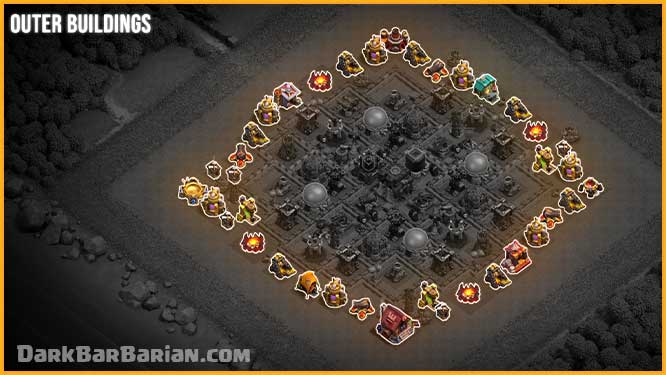
Now, let’s talk about the outer buildings. I’ve arranged them in an alternating pattern to avoid placing the same types of collectors next to each other. Many players overlook this detail and end up grouping similar collectors together, making them an easy target for attackers. By spreading them out, it forces opponents to spend more time and troops taking them down, making their attack less efficient.
That’s it for the Base Analysis
I’ve left a copy link for this base below, or you can copy this base through any of those links, unless you want to copy it manually, that’s pretty much it for the base analysis, I’ll see you guys in the next one.
BEST DEFENSIVE CLAN CASTLE TROOPS COMBINATIONS
Using clan castle troops for defending your base is highly recommended as they can put the attacker in trouble by distracting them. Even though the base alone is sufficient to stop most of the attacks used by Town Hall 10 attackers, using the clan castle can help a lot. At Town Hall 10 you can get Maximum of 35 housing space in your clan castle, here are some of my recommendations for CC troops combinations for defense at Town Hall 10 :-
- 1 Electro Dragon + 1 Balloon (Recommended)
- 1 Baby Dragon + 2 Valkyrie + 2 Wizard
- 1 Golem + 1 Wizard + 1 Archer
- 1 Witch + 5 Wizards + 3 Archers
- 1 Lava Hound + 1 Balloon
- 1 Dragon + 3 Wizard + 1 Archer
Since most people can’t get these troops from their clans, you can also use other troop combinations which are easily available like all wizards, all balloons or any other troop combination but i highly recommend you to have above mentioned troops for best defensive experience at Town Hall 10.
FEATURES OF THIS BASE
- Centered and well-protected Town hall
- Number of compartments helps slowing down opponents’ troops.
- Air Defenses are well protected and nicely paired with Air Sweepers.
- Perfect traps placement
- Evenly Placed Defensive Buildings
- Wizard Towers in well-protected compartments
- Great Against Both Ground & Air Attacks
- Inferno towers well protected
- X-bows in well protected compartments
- Archer Towers in each corner of the base.
COPY BASE
If you want to copy this base just click on the Copy Base Button, it will redirect you, from where you can easily copy this base design.
Copy Base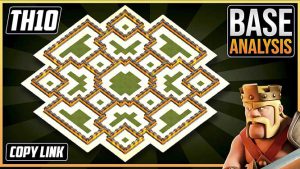
Op