THE NEW ULTIMATE TH11 HYBRID/TROPHY Base 2024!! COC Town Hall 11 Trophy Base Design – Clash of Clans
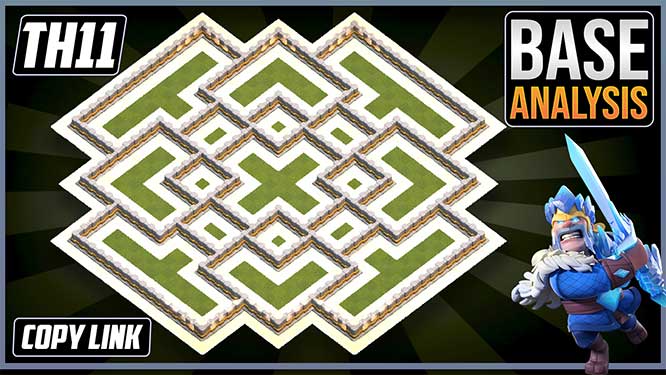
If you’re looking for THE NEW ULTIMATE TH11 HYBRID/TROPHY Base 2024!! COC Town Hall 11 (TH11) Trophy Base Design – Clash of Clans, then you have come to the right place. This base is one of the best base for coc Town Hall 10 available on YouTube. This Town Hall 10 coc base layout can be used for Trophy pushing. To know more about this TH10 best coc base, continue reading this post.
BASE DESCRIPTION
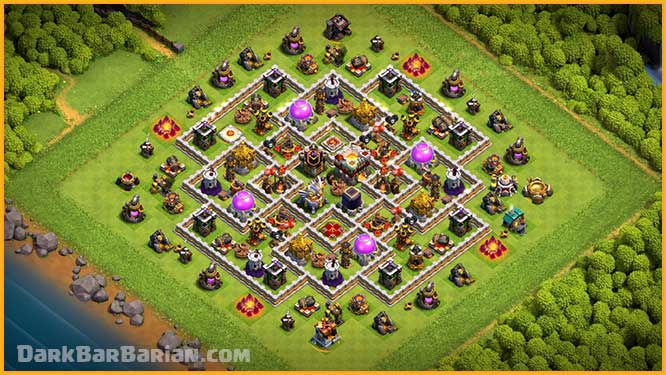
Hey guys! This is Dark Barbarian, Welcome back to the channel. Today, we’re going to do a deep dive into another Town Hall 11 base layout that’s designed to give attackers a serious headache. We’ll break down the defense placements, traps, hero positioning, and everything else you need to know to maximize the effectiveness of your base. So, without wasting any time, I’ll see you guys after the speed build.
Let’s do the Base Analysis!
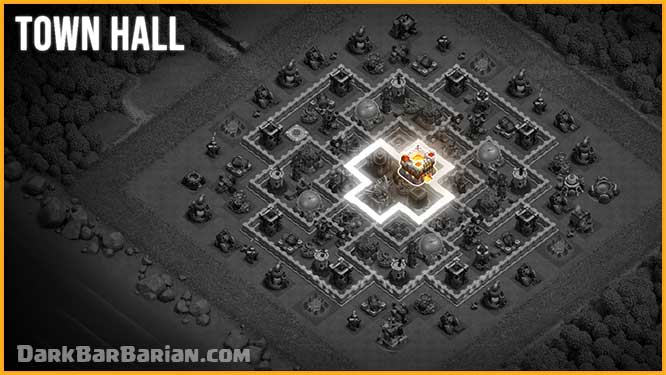
“First, let’s talk about the Town Hall placement. In this base, the Town Hall is positioned slightly off-center, but it’s still very well-protected. Surrounding the Town Hall, we’ve placed some of the most powerful defenses like the Inferno Towers and the Eagle Artillery. This makes it incredibly difficult for attackers to target the Town Hall without suffering major damage. It’s the core building of your base, so protecting it is a high priority.”
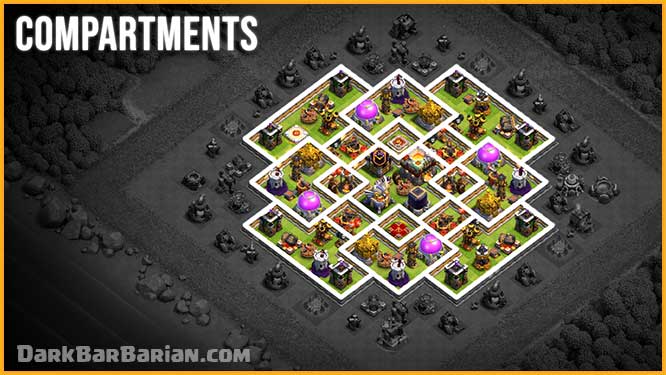
“Now, when it comes to the compartment structure, this base uses a lot of them—and for a good reason. The more compartments you have, the longer it takes for the attacker’s troops to break through. Each compartment houses key defenses and creates choke points that slow down the enemy. This layout is especially effective against mass attacks like giants and golem, where troops tend to spread out. The compartments keep them stuck in different areas of the base, making it harder for them to advance towards the core.”
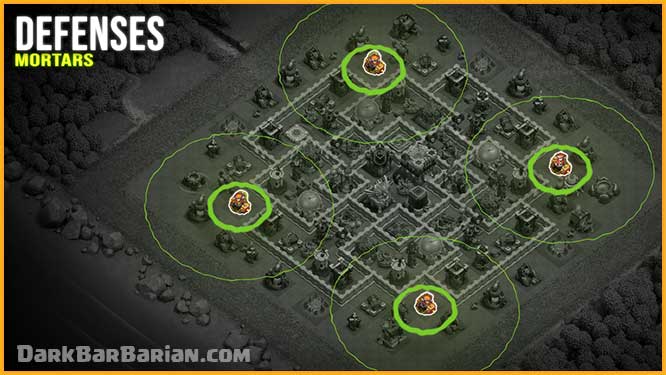
“Starting off with the mortars. Just like in any strong base, these mortars are placed in the outer side of the base. Their main job? Defend against low-hitpoint spam armies like BARCH and mass goblins. They cover nearly the whole base, except for the core, which doesn’t really need their protection since most of those weak troops won’t make it that far into the base. Simple, but effective.”
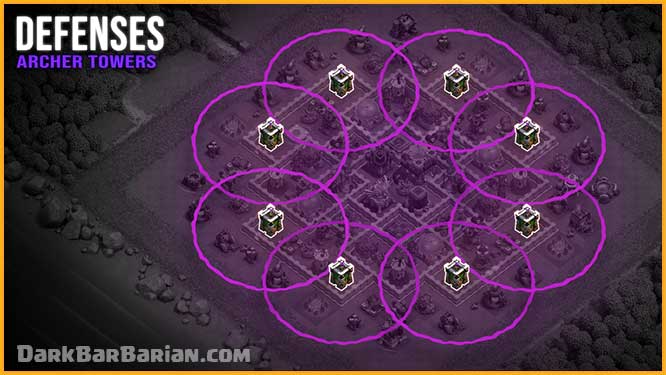
“Moving on to the archer towers. Each outer compartment has two, carefully placed with enough space between them to create a balanced defense. They’re great for handling both ground and air attacks, which is exactly what we need for overall protection across the base. The layout keeps things even and makes sure no part of the base is left unguarded.”
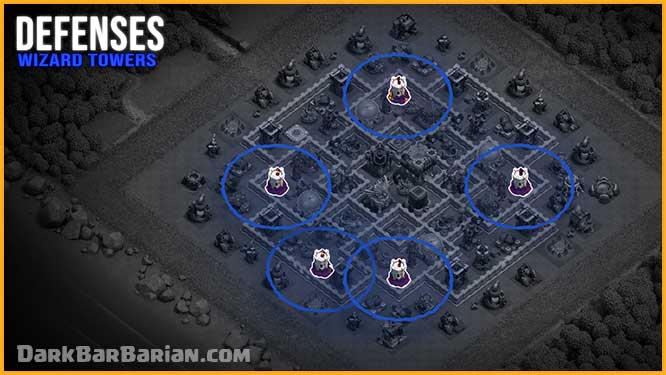
“Now let’s talk about one of the most important defenses: wizard towers. Correct placement here is crucial, especially at Town Hall 11. These towers deal splash damage, which is key for stopping big groups of troops like minions and bat spells. That’s why I’ve spread them across multiple compartments. This way, they can protect other key defenses. When you’re designing or choosing a base, make sure your wizard towers cover at least 3 or 4 other defenses. If not, their positioning might need some adjustment.”
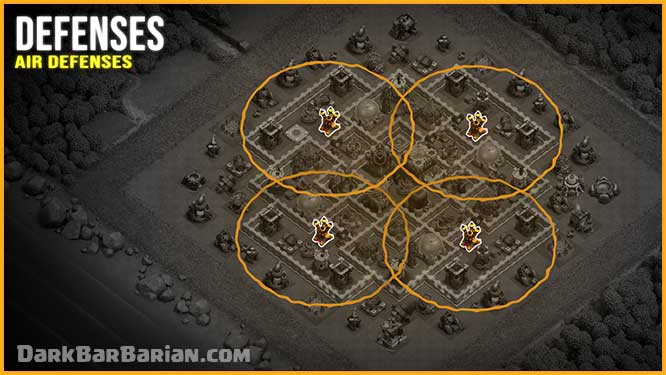
“Air defenses are next. The key here is to avoid clumping them together by lightning spell. That’s why I’ve spread them across different compartments, giving them wide coverage over almost the entire base. Pairing these air defenses with air sweepers makes this base tough against air-based armies like lava loons, dragons, and balloons. If you’re facing a lot of air attacks, this setup will definitely give attackers a hard time.”
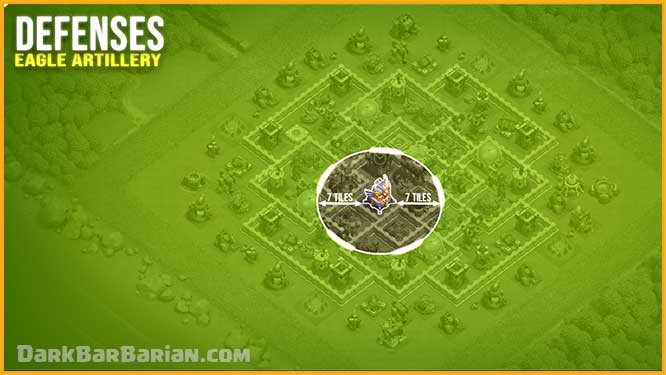
“Alright, now let’s focus on the heavy hitter: the Eagle Artillery. Positioned right in the core of the base, it’s well protected and covers nearly the entire base. The first 7 tiles aren’t hit by the Eagle, but don’t worry—the other defenses handle that. Keeping the Eagle Artillery in the core makes it harder for attackers to take down early, which can really mess up their plans.”
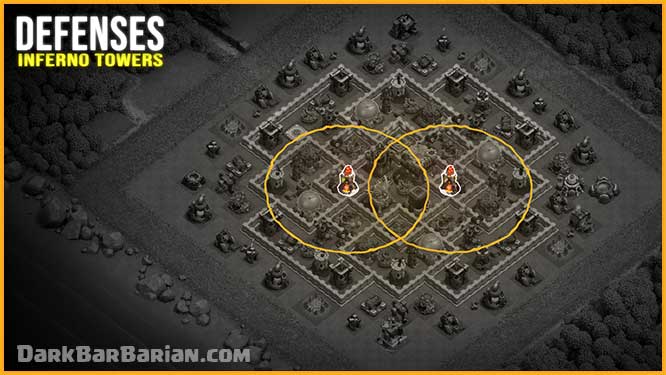
“Inferno towers are super important, especially at Town Hall 11. I’ve placed them close to the core so they’re well-protected and can guard critical defenses like the Eagle Artillery, x-bows, and your Town Hall. When setting them up, you need to choose between single-target and multi-target modes, depending on the armies you’re facing. If you’re going up against armies with lots of low-health troops, like miners or witches, use the multi-target mode. For high-health troops like Electro dragons and golems, go with the single-target mode.”
“Cannons are pretty straightforward. I’ve placed them in areas where they’re needed most for ground defense. They’re balanced throughout the base, making sure no part is left vulnerable to ground troops.”
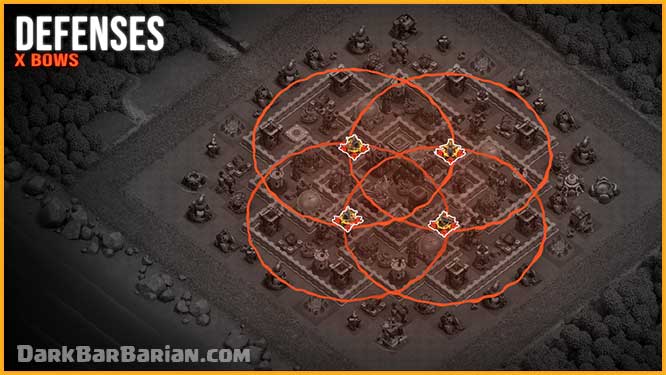
“Next, we have the X-bows. These are positioned in four compartments near the core and set to target both air and ground units. While you might be tempted to set them to ground for the extra range, I found it’s better to keep them dual-target because both air and ground attacks are a threat.”
“We’ve spread out our heroes—the Archer Queen and Barbarian King—into separate compartments. This prevents attackers from luring them out too easily. These heroes work great against both air and ground armies. For example, when placed near air defenses, the Archer Queen can quickly take down a lava hound, while the Barbarian King can do serious damage to ground troops like hogs. We’ve also got the Grand Warden positioned to support other defenses and make sure he’s not easily pulled out of position.”
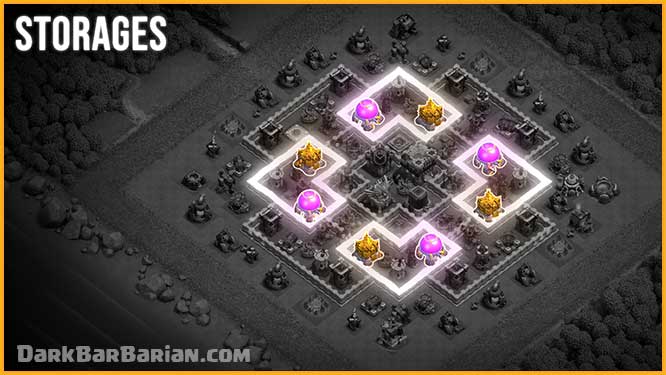
When it comes to storages, they are spread evenly throughout multiple compartments; most rookie base designers make the mistake of placing all storages in the center and defenses on the outer compartments. As a result, once the attacker has penetrated the compartment of defenses, they have access to all of the loot.
Because the storages are in different compartments in this base, the attacker will have to take out the entire base in order to acquire all of the loot.
Also remember to never put the same type of storages on the same side of the base; for example, if we put both gold storages on this side of the base, the attacker will be able to grab almost all of your gold merely by destroying this portion of the base. As a result, in order to avoid this. We alternate their placement, much like this base.
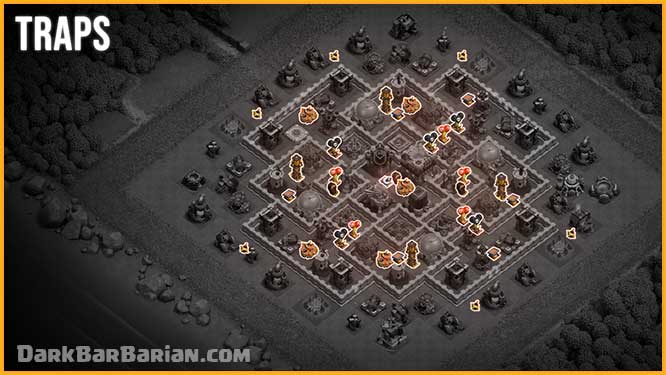
In regards to trap placement, I’ve seen plenty of attacks on this base and discovered certain areas where most opponents are likely to drop their troops, as well as pathings where troops are most likely to walk through, and I’ve planted these traps in those areas to make maximum use of them.
after observation of so many attacks on this base, spring traps, and giant bombs are strategically placed in different compartments according to the pathing of defense attacking troops like hogs and giants, which helps in making this base stronger against ground attacks.
Seeking air mines are set up near air defenses, targeting single air troops with high damage, perfect for dealing with lava hounds. Air bombs are spread throughout the outer compartments, dealing splash damage to balloons and minions.
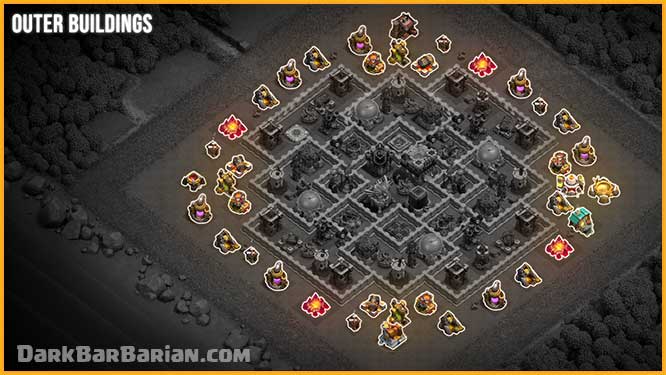
“When it comes to the outer buildings, make sure not to place the same types of resource collectors right next to each other. I’ve alternated their placement to make it harder for attackers to take them all out at once. Many players don’t think about this and end up making their collectors easy targets, so take the extra time to spread them out.”
That’s it for the Base Analysis
Even if your base is powerful enough on its own, having defensive troops in your clan castle will benefit you a lot, since clan castle troops can help you waste opponents’ troops and time. Having clan castle troops is necessary to make the maximum use of our base’s centralised clan castle function.
If you want to copy this base just click on the Copy Base Button, it will redirect you, from where you can easily copy this base design.
BEST DEFENSIVE CLAN CASTLE TROOPS COMBINATIONS
Using clan castle troops for defending your base is highly recommended as they can put the attacker in trouble by distracting them. Even though the base alone is sufficient to stop most of the attacks used by Town Hall 10 attackers, using the clan castle can help a lot. At Town Hall 10 you can get Maximum of 35 housing space in your clan castle, here are some of my recommendations for CC troops combinations for defense at Town Hall 10 :-
- 1 Electro Dragon + 1 Balloon (Recommended)
- 1 Baby Dragon + 2 Valkyrie + 2 Wizard
- 1 Golem + 1 Wizard + 1 Archer
- 1 Witch + 5 Wizards + 3 Archers
- 1 Lava Hound + 1 Balloon
- 1 Dragon + 3 Wizard + 1 Archer
Since most people can’t get these troops from their clans, you can also use other troop combinations which are easily available like all wizards, all balloons or any other troop combination but i highly recommend you to have above mentioned troops for best defensive experience at Town Hall 10.
FEATURES OF THIS BASE
- Centered and well-protected Eagle Artillery
- Air Defenses are well protected
- Optimal Perfect traps placement
- So many compartments that slows down opponent troops
- Wizard Towers in well-protected compartments
- Great Against Both Ground & Air Attacks
- Inferno towers well protected near the core.
- X-bows in well protected compartments
- Archer Towers in each corner of the base.
- Bomb tower is placed near the inferno towers.
COPY BASE
If you want to copy this base just click on the Copy Base Button, it will redirect you, from where you can easily copy this base design.
Copy Base


Mkk
Dhdh