
THE BEAST BH6 TROPHY [defense] Base 2023 Builder Hall 6 Trophy Base Design with Copy Link – COC
![THE BEAST BH6 TROPHY [defense] Base 2023 Builder Hall 6 Trophy Base Design with Copy Link - COC](https://darkbarbarian.com/wp-content/uploads/2023/07/thumb-nail.jpg)
If you’re looking for THE BEAST BH6 TROPHY [defense] Base 2022 Builder Hall 6 Trophy Base Design with Copy Link – COC then you have come to the right place. This base is one of the best and most popular bases for coc Builder Hall 6 available on YouTube with over 150k+ views on YouTube. This Builder Hall 6 coc base layout can be used for Trophy pushing. To know more about this BH6 best coc base, continue reading this post.
BASE DESCRIPTION
Hey everyone, Dark here with an incredibly strong Builder Hall 6 base to share with y’all today. This is the first time I’m featuring a base with both stages of Builder Hall 6 on this page. I’ll go into a detailed analysis of this base, explaining all its components and answering any questions you guys might have. So, join me for the base analysis section in the post. Catch y’all there
Let’s do the Base Analysis!
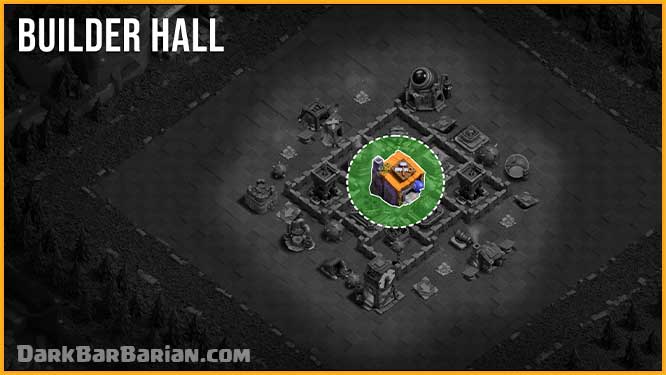
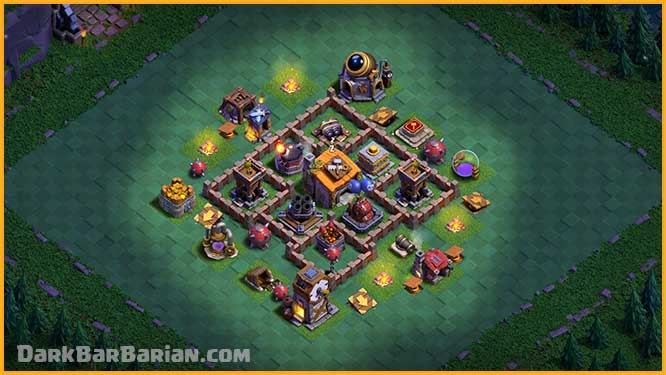
As y’all can see, the builder hall is nicely secured right in the center of the base with all our defenses. This is a fundamental aspect of any builder hall base I create because we don’t want opponents to snatch our second star too easily.

Now, let’s look at the the multi-mortar and air bombs. I prefer keeping these two defenses in close proximity since they work together effectively against strategies like Mass Night Witch. The multi-mortar’s extended range helps eliminate the night witches, while the air bomb takes care of the bats attempting to distroy our multi-mortar. By combining the multi-mortar and air bomb, we have a solid approach to handle armies like these.
The Crusher is strategically placed in the core of the base next to the Builder Hall. This placement is preferred over isolating it in a corner because when the Crusher is in a corner, opponents can attack from the opposite side and take out a large portion of the base without having to worry about the Crusher. However, by positioning the Crusher in the core, opponents will inevitably have to confront it, regardless of the side they choose to attack from.

archer towers are placed in well-protected spots from where their range covers the whole base, so no side is left weak to any kind of attacks. firecrackers combined with archer towers can stop almost all types of air attack.

This cannon is positioned outside of the wall, This is mainly because of the limited wall space we have since we need to accommodate two bases with 120 walls, It becomes challenging to fit all the defenses within the walls while maintaining a balanced closed base design.
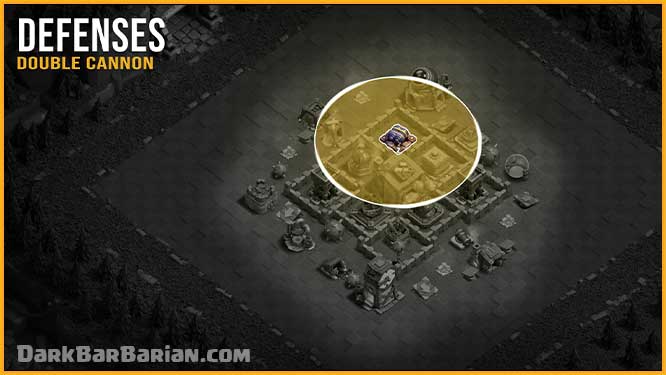
The double cannon is placed in this compartment of the base to ensure safety from attacks coming from the top side. Its range and multi-shot ability provide effective defense in that area of the base.
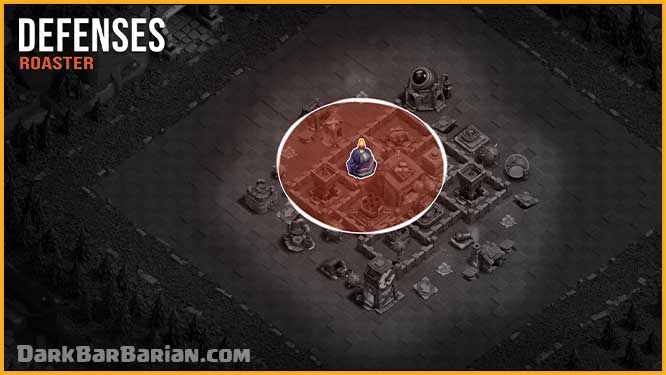
Roaster is the only defense at bh6 that can target air and ground troops with splash damage ability; we positioned it here to cover our base from the top side, and it also combines with multi mortar to provide much effective defensive results.
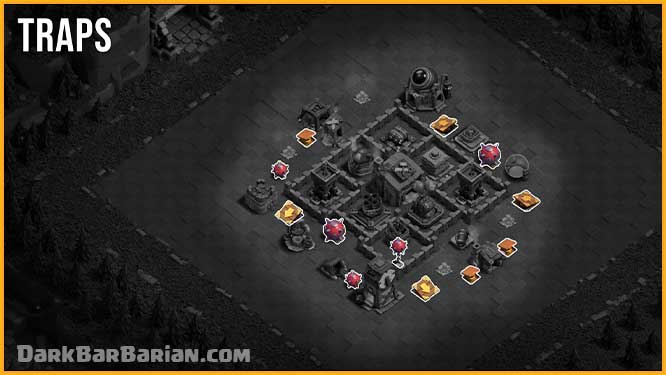
now coming to the trap’s placement, I’ve placed these traps after observing opponent’s troops pathing on this base against multiple strategies, so opponent’s troops are most likely to trigger them while attacking our base.
some of the push traps push troops away from the base, so all opponent’s troops don’t overpower our defenses at once and our defenses get some additional time to react.
mines and mega mines are configured in ground mode to assist other defenses by lowering the health of enemy troops at the beginning of the battle.
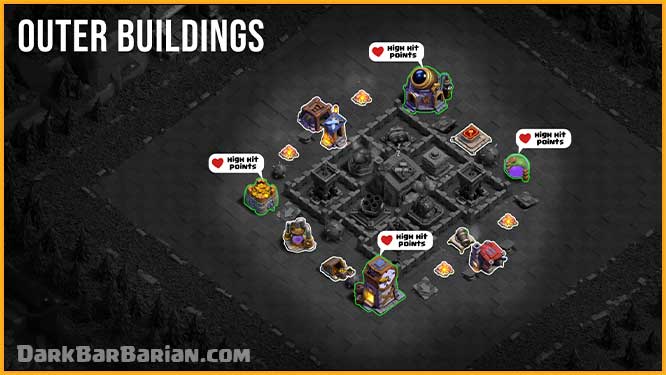
coming to the outer buildings, they are smartly placed at a distance from one another to ruin opponents funnel, and you can see how we’ve placed high hitpoint buildings like laboratory, clocktower and storages in front of our main defenses, so the opponents will have to put extra effort to reach our defenses.
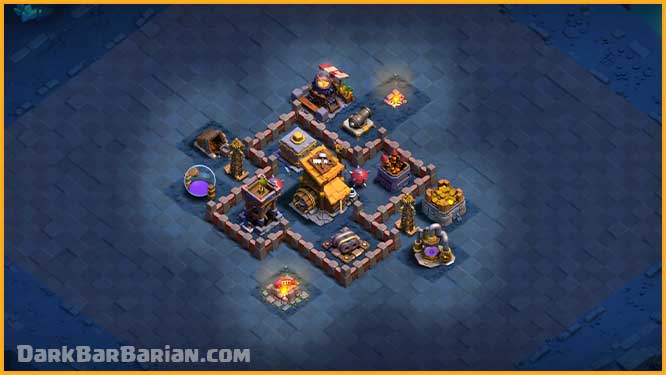
that’s it for the stage 1, lets head to stage 2
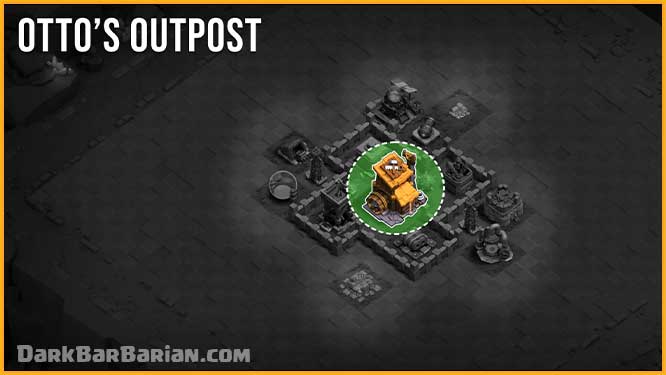
first of all, otto’s outpost is kept right in the center guarded by all our defense, as we don’t wanna give away the fourth star that easily.
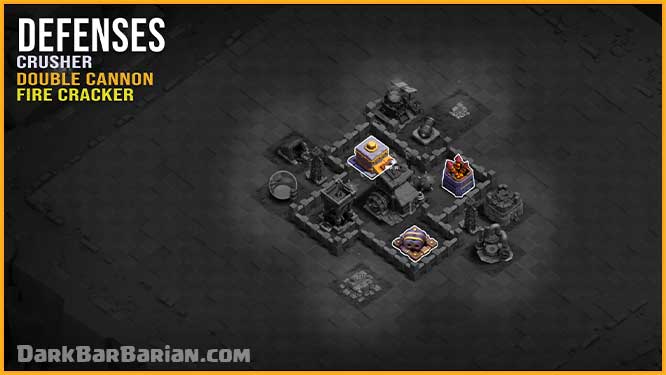
After the battle at the Builder Hall, there are usually only a few enemy troops left. Therefore, we focus on making the Crusher and Double Cannon our main defenses against ground troops due to their high damage per second. As for air attacks, the Firecracker takes the lead. That’s why we’ve placed these defenses near Otto’s Outpost at the core of the base.
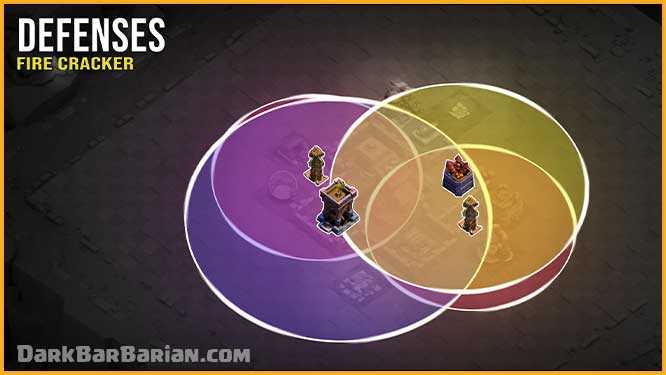
The Firecracker offers wide-ranging coverage throughout the entire base and works together with the Archer Tower and Hidden Tesla to establish a strong defense against air attacks.
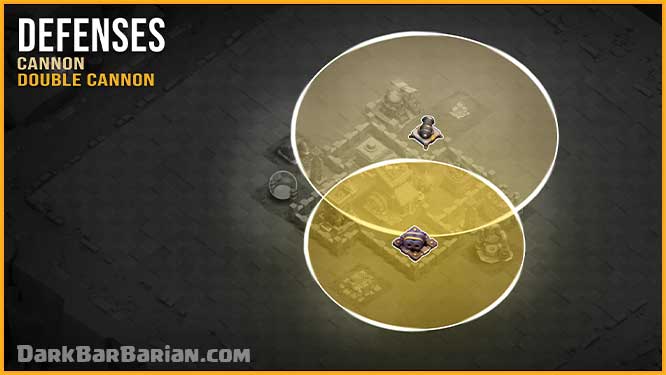
The cannons and double cannon are strategically positioned to cover a large portion of the base, ensuring that no side is left vulnerable to ground attacks.
that’s pretty much in the base analysis,
I’ve left a copy link for this base below, you can copy this base through any of those links, unless you want to copy it manually, that’s pretty much it for base analysis, I’ll see you guys in the next one.
If you want to copy this base just click on the Copy Base Button, it will redirect you, from where you can easily copy this base design.
FEATURES OF THIS BASE
- Builder hall well protected in the center
- Openings that will leave enemies in eternal confusion
- Crushers are placed at a distance
- Multi Mortar and Air bomb kept close together.
- Perfect trap placements according to the openings we have created
- Defensive placements are evenly done.
- Beast Against both Ground & Air Attacks
- The guard post is placed close to the crusher
COPY BASE
If you want to copy this base just click on the Copy Base Button, it will redirect you, from where you can easily copy this base design.
Copy Base![THE BEST BH6 TROPHY [defense] Base 2022 Builder Hall 6 Trophy Base Design with Copy Link - COC](https://darkbarbarian.com/wp-content/uploads/2023/02/thumbnail-300x169.jpg)
![THE NEW BEST BH6 TROPHY [defense] Base 2022 Builder Hall 6 Trophy Base Design with Copy Link - COC](https://darkbarbarian.com/wp-content/uploads/2022/09/thumb-300x169.jpg)
![NEW ULTIMATE BH6 TROPHY [defense] Base 2022 Builder Hall 6 Trophy Base Design with Copy Link - COC](https://darkbarbarian.com/wp-content/uploads/2022/03/thumb-nail-300x169.jpg)
you are a very good Base designer I love your Base design